TableLayout
Контейнер TableLayout структурує елементи керування у вигляді таблиці за стовпчиками та рядками. Визначимо у файлі activity_main.xml елемент TableLayout, який міститиме два рядки і два стовпці:
<TableLayout xmlns:android="http://schemas.android.com/apk/res/android"
    android:layout_width="match_parent"
    android:layout_height="match_parent">
    <TableRow>
        <TextView
            android:layout_weight="0.5"
            android:text="Логин"
            android:layout_width="wrap_content"
            android:layout_height="wrap_content" />

        <EditText
            android:layout_weight="1"
            android:layout_width="match_parent"
            android:layout_height="wrap_content"  />
    </TableRow>

    <TableRow>
        <TextView
            android:layout_weight="0.5"
            android:text="Email"
            android:layout_width="wrap_content"
            android:layout_height="wrap_content" />

        <EditText
            android:layout_weight="1"
            android:layout_width="wrap_content"
            android:layout_height="wrap_content" />
    </TableRow>
</TableLayout>
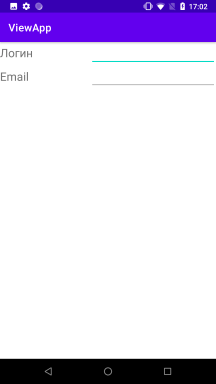
Використовуючи елемент TableRow, ми створюємо окремий рядок. Як розмітка дізнається скільки стовпців треба створити? Android знаходить рядок із максимальною кількістю віджетів одного рівня, і ця кількість означатиме кількість стовпців. Наприклад, у цьому випадку в нас визначено два рядки і в кожному по два елементи. Якби в якомусь із них було б три віджети, то відповідно стовпців було б також три, навіть якщо в іншому рядку залишилося б два віджети.
Причому елемент TableRow успадковується від класу LinearLayout, тому ми можемо до нього застосовувати той самий функціонал, що й до LinearLayout. Зокрема, для визначення простору для елементів у рядку використовується атрибут android:layout_weight.
Якщо якийсь елемент має бути розтягнутий на низку стовпців, то ми можемо розтягнути його за допомогою атрибута layout_span, який вказує, на яку кількість стовпців треба розтягнути елемент:
<TableLayout xmlns:android="http://schemas.android.com/apk/res/android"
    android:layout_width="match_parent"
    android:layout_height="match_parent">
    <TableRow>
        <TextView
            android:textSize="22sp"
            android:text="Логин"
            android:layout_width="100dp"
            android:layout_height="wrap_content" />

        <EditText
            android:textSize="22sp"
            android:layout_width="200dp"
            android:layout_height="wrap_content"  />
    </TableRow>

    <TableRow>
        <TextView
            android:textSize="22sp"
            android:text="Email"
            android:layout_width="wrap_content"
            android:layout_height="wrap_content" />

        <EditText
            android:textSize="22sp"
            android:layout_width="wrap_content"
            android:layout_height="wrap_content" />
    </TableRow>
    <TableRow>
        <Button
            android:text="Отправить"
            android:layout_width="wrap_content"
            android:layout_height="wrap_content"
            android:layout_span="2"/>
    </TableRow>
</TableLayout>
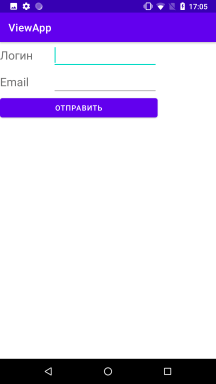 Також можна розтягнути елемент на весь рядок, встановивши в нього атрибут
 android:layout_weight=«1»:
<TableRow>
    <Button
        android:text="Отправить"
        android:layout_width="match_parent"
        android:layout_height="wrap_content"
        android:layout_weight="1" />
</TableRow>
Програмне створення TableLayout
Створимо TableLayout програмним чином, переклавши на код java найперший приклад із цієї статті:
package com.example.viewapp;

import androidx.appcompat.app.AppCompatActivity;
import android.os.Bundle;
import android.widget.EditText;
import android.widget.TableLayout;
import android.widget.TableRow;
import android.widget.TextView;

public class MainActivity extends AppCompatActivity {

    @Override
    protected void onCreate(Bundle savedInstanceState) {
        super.onCreate(savedInstanceState);

        TableLayout tableLayout = new TableLayout( this);

        // перший рядок
        TableRow tableRow1 = new TableRow(this);

        TextView textView1 = new TextView(this);
        textView1.setText("Логин");
        tableRow1.addView(textView1, new TableRow.LayoutParams(
                TableRow.LayoutParams.WRAP_CONTENT, TableRow.LayoutParams.WRAP_CONTENT, 0.5f));

        EditText editText1 = new EditText(this);
        tableRow1.addView(editText1, new TableRow.LayoutParams(
                TableRow.LayoutParams.WRAP_CONTENT, TableRow.LayoutParams.WRAP_CONTENT, 1.0f));

        // другий рядок
        TableRow tableRow2 = new TableRow(this);

        TextView textView2 = new TextView(this);
        textView2.setText("Email");
        tableRow2.addView(textView2, new TableRow.LayoutParams(
                TableRow.LayoutParams.WRAP_CONTENT, TableRow.LayoutParams.WRAP_CONTENT, 0.5f));

        EditText editText2 = new EditText(this);
        tableRow2.addView(editText2, new TableRow.LayoutParams(
                TableRow.LayoutParams.WRAP_CONTENT, TableRow.LayoutParams.WRAP_CONTENT, 1.f));

        tableLayout.addView(tableRow1);
        tableLayout.addView(tableRow2);
        setContentView(tableLayout);
    }
}
Приклад
<?xml version="1.0" encoding="utf-8"?>
<!-- Стовпець 1 буде автоматично розтягуватися -->
<TableLayout
    xmlns:android="http://schemas.android.com/apk/res/android"
    android:layout_width="match_parent"
    android:layout_height="wrap_content"
    android:stretchColumns="1"
    android:padding="16dp">

    <!-- Заголовок таблиці -->
    <!-- Об'єднання двох стовпців -->
    <TableRow>
        <TextView
            android:layout_width="wrap_content"
            android:layout_height="wrap_content"
            android:text="Дані клієнта"
            android:textSize="20sp"
            android:textStyle="bold"
            android:layout_span="2"
            android:gravity="center" />
    </TableRow>

    <!-- Рядок 1: Ім'я -->
    <TableRow>
        <TextView
            android:layout_width="wrap_content"
            android:layout_height="wrap_content"
            android:text="Ім'я:" />

        <EditText
            android:layout_width="match_parent"
            android:layout_height="wrap_content"
            android:hint="Введіть ім'я"
            android:inputType="textPersonName" />
    </TableRow>

    <!-- Рядок 2: Телефон -->
    <TableRow>
        <TextView
            android:layout_width="wrap_content"
            android:layout_height="wrap_content"
            android:text="Телефон:" />

        <EditText
            android:layout_width="match_parent"
            android:layout_height="wrap_content"
            android:hint="Введіть телефон"
            android:inputType="phone" />
    </TableRow>

    <!-- Рядок 3: Email -->
    <TableRow>
        <TextView
            android:layout_width="wrap_content"
            android:layout_height="wrap_content"
            android:text="Email:" />

        <EditText
            android:layout_width="match_parent"
            android:layout_height="wrap_content"
            android:hint="Введіть email"
            android:inputType="textEmailAddress" />
    </TableRow>

    <!-- Рядок 4: Кнопки -->
    <TableRow>
        <Button
            android:layout_width="wrap_content"
            android:layout_height="wrap_content"
            android:text="Очистити" />

        <Button
            android:layout_width="wrap_content"
            android:layout_height="wrap_content"
            android:text="Зберегти" />
    </TableRow>

</TableLayout>
Коли використовувати TableLayout
Ситуації для використання:
- Табличні форми: наприклад, для введення даних користувача чи форм замовлень, де кожен рядок містить мітку та відповідне поле для введення.
- Звіти: відображення невеликої кількості даних у табличному вигляді (наприклад, кількість замовлень чи статистика).
- Прості таблиці: коли потрібно забезпечити вирівнювання елементів за стовпцями.
RecyclerView: кращий вибір для великих табличних даних, оскільки підтримує оптимізовану роботу з великим набором елементів і додає можливості для прокручування.
